Cortex — Configuration Builder
Cortex is the detailed, form-based agent builder for users who want precise control over every aspect of their agent's configuration. Instead of describing what you want conversationally (like Gunnies), you directly configure each setting through a structured form.
When to Use Cortex
Use Cortex when you need:
- Fine-grained control over every configuration option
- Specific technical settings like model selection, tools, and conversion tables
- Complex agent behavior that's easier to define through forms than conversation
Creating an Agent with Cortex
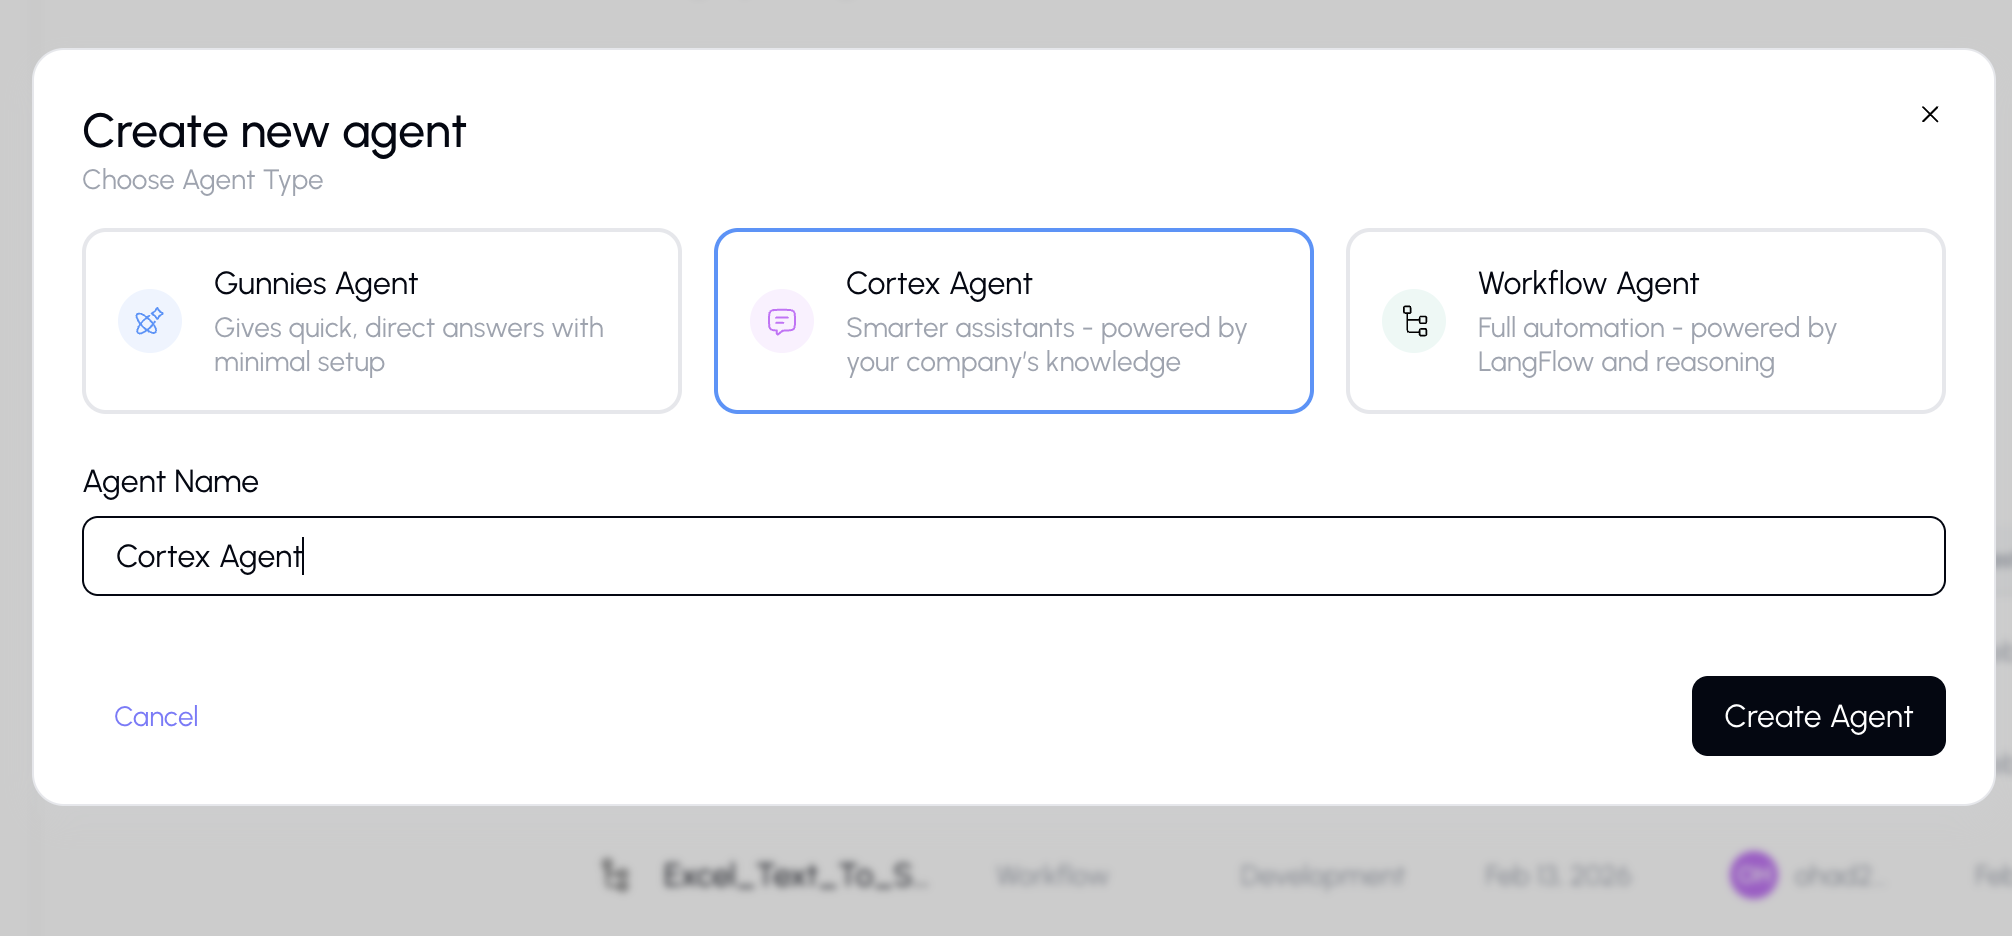
Step 1: Start the Builder
- Go to the Agents page from the sidebar.
- Click "Create Agent" (or the "+" button).
- Select "Cortex" from the agent type dialog.
- Enter a name for your agent.
- The configuration studio will open in form mode.
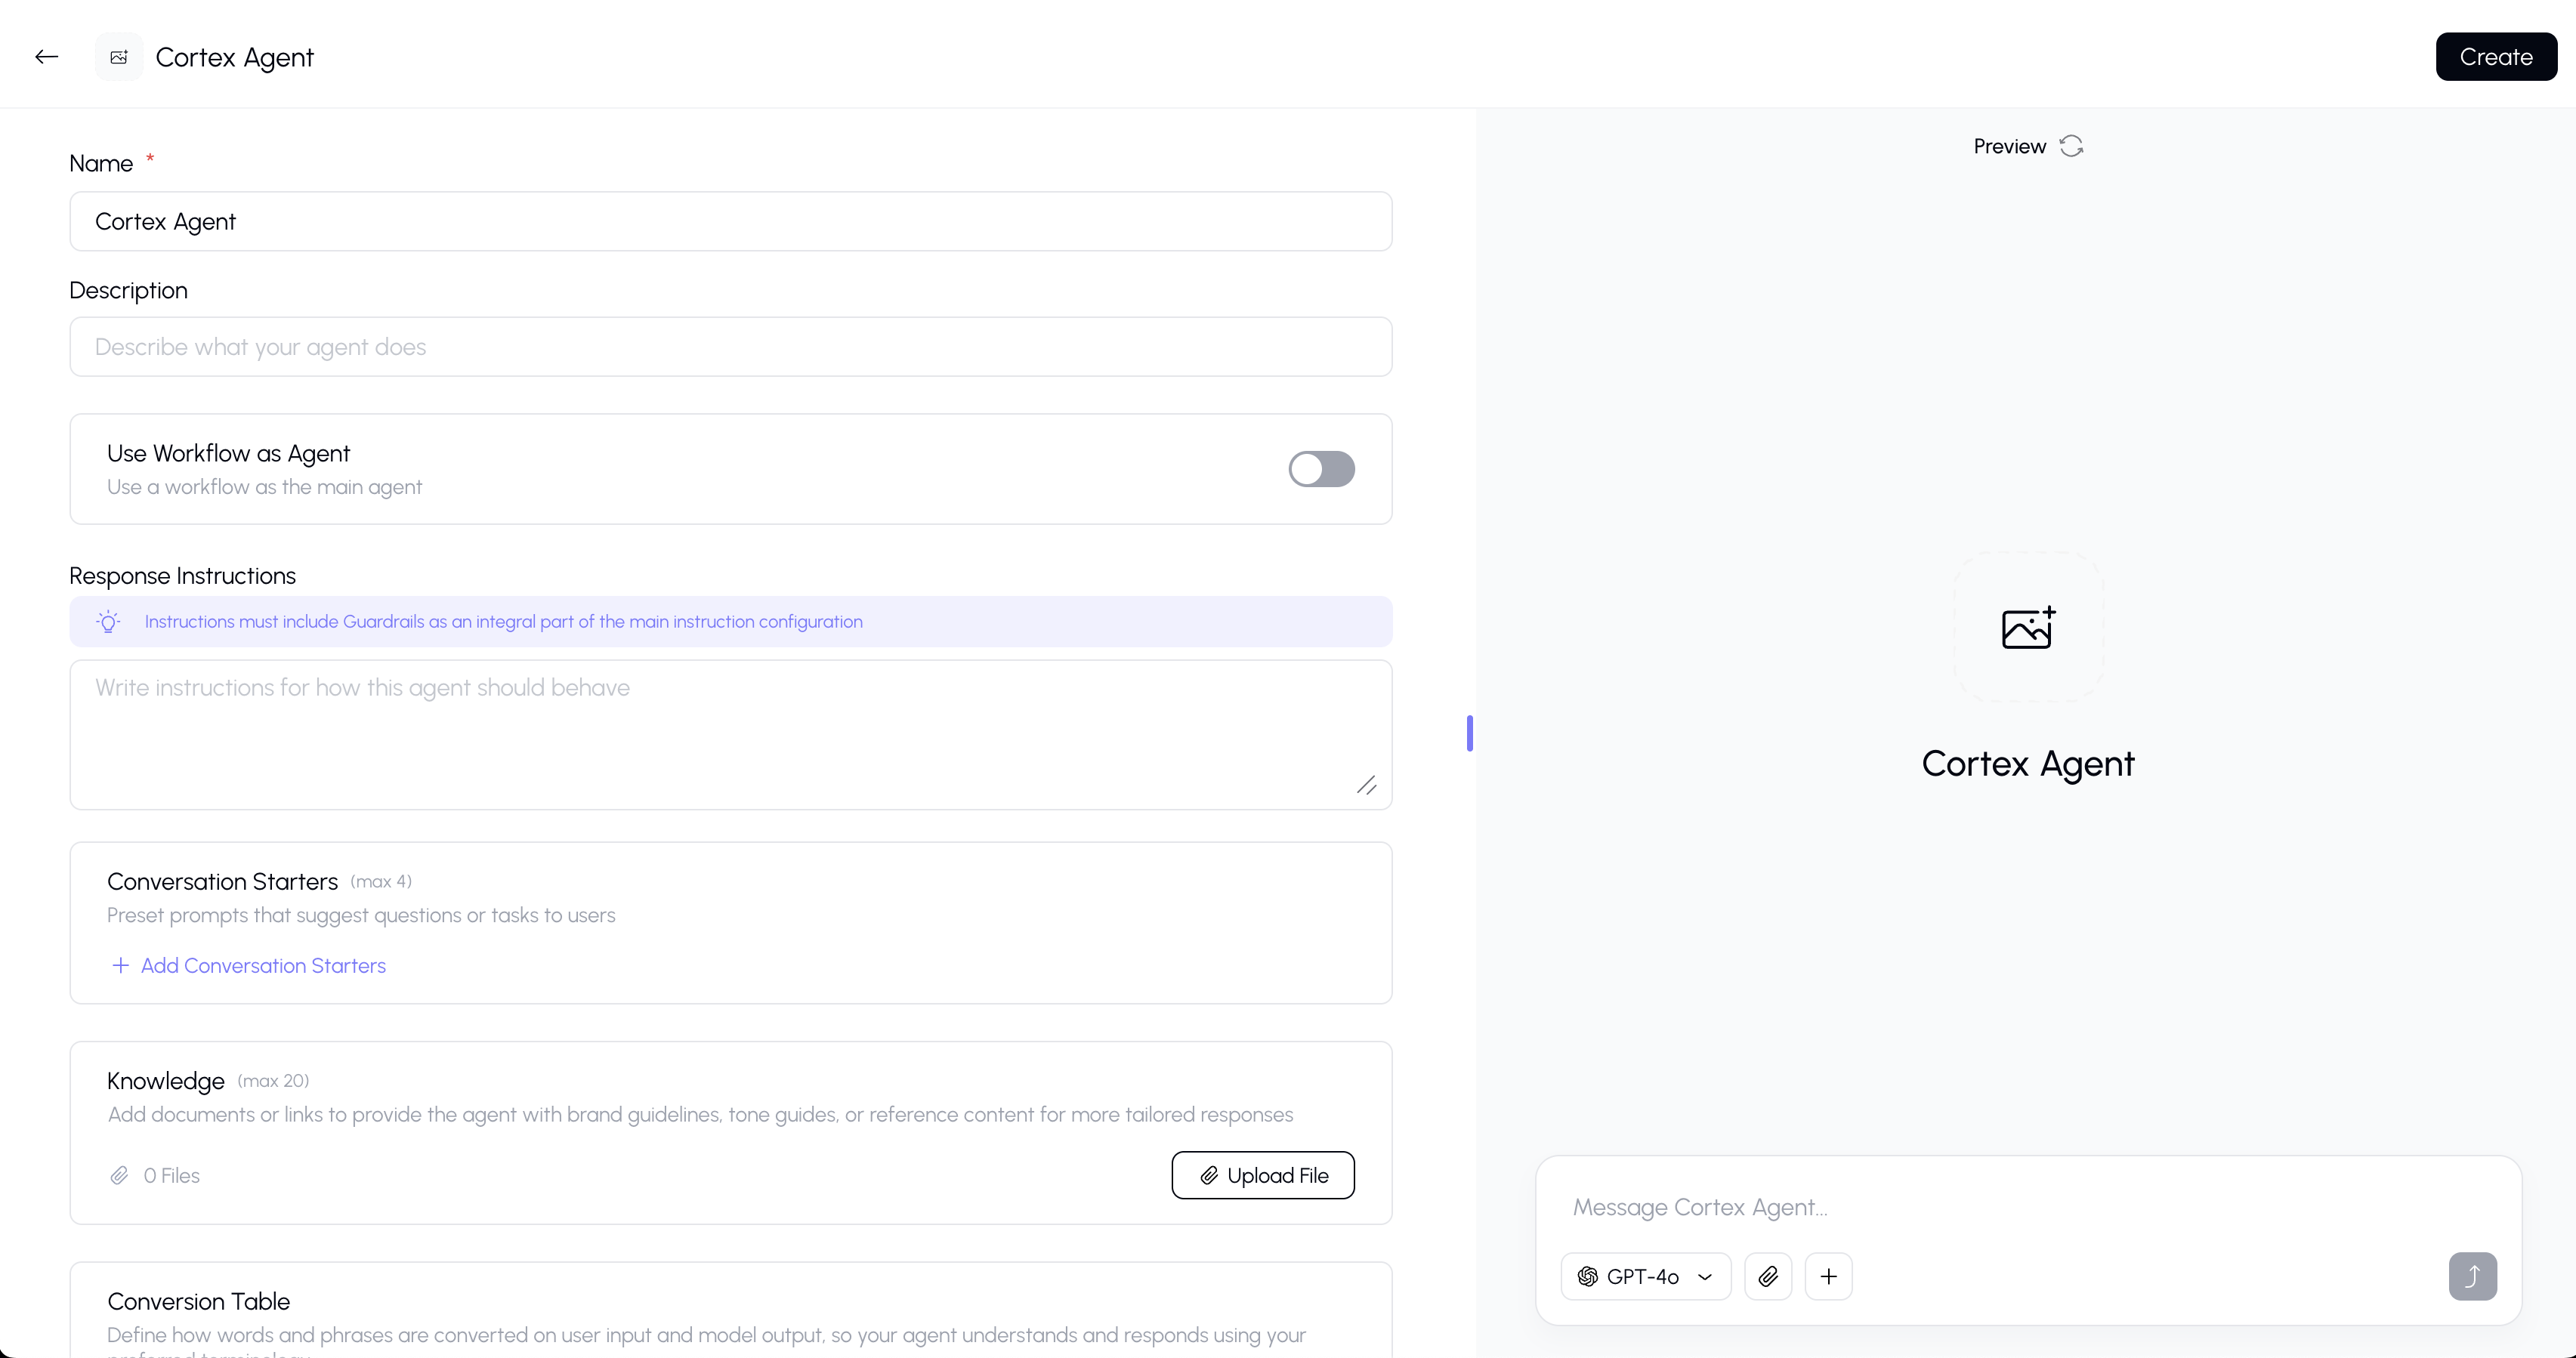
Configuration Settings
The Cortex builder presents the following configuration fields:
Knowledge Sources
Attach documents and files that the agent can reference when answering questions.
- Click the Knowledge field.
- Browse or search through your available knowledge sources.
- Select the documents you want the agent to have access to.
- The agent will use these as its knowledge base for RAG (Retrieval-Augmented Generation).
Note: When sharing an agent that has knowledge sources, you'll be asked whether to share the source files too.
Capabilities
Enable or disable specific tools for your agent:
- Canvas — Allow the agent to create and edit documents
- Web Search — Allow the agent to search the internet
- Upload Files — Allow the agent to upload files
Toggle each tool on or off using the tool cards.
Model Selection
Choose which AI model your agent will use. Different models have different strengths:
- Some models are faster but less capable
- Some models are better at reasoning or creative tasks
- Recommended models are highlighted in the dropdown
The model you choose here will be used every time someone chats with the agent — users won't be able to change it.
Conversation Starters
Set up suggested prompts that appear when a user starts a new conversation with the agent. These help users understand what the agent can do and provide quick ways to begin.
Add multiple starters — each one appears as a clickable chip in the chat.
Conversion Table
Configure specific conversion actions for the agent — these define specialized input/output transformations the agent can perform.
Workflow Selection
(For workflow-type agents only) Select which workflow the agent is connected to.
Preview Panel
The right side of the Cortex builder shows a live preview of your agent. As you make changes in the configuration form, you can immediately test them:
- Type a message in the preview chat.
- The agent responds using your current configuration.
- Adjust settings and test again until you're satisfied.
Saving Your Agent
When your configuration is complete:
- Click the Save (or Create) button in the header.
- Your agent is saved and immediately available for use.
- You can always come back to edit it later from the Agents page.
Tips
- Always test your agent in the preview panel before saving.
- Start with the essentials (name, instructions, model) and add complexity gradually.
- If you're not sure about a setting, leave it at the default — you can always adjust later.
- For complex agents, combine multiple knowledge sources and tools for the most capable experience.
- Consider adding 3-5 conversation starters to help users understand what the agent can do.