Gunnies — Simple Agent Builder
Gunnies is the fastest and easiest way to create an agent. Instead of filling out forms and configuring settings manually, you simply describe what you want your agent to do in plain language, and the AI helps you build it.
How Gunnies Works
Gunnies uses a conversational approach to agent creation. You chat with the AI about the agent you want to build, and it generates the configuration for you. It's like describing a job to a colleague and letting them set everything up.
Creating an Agent with Gunnies
Step 1: Start the Builder
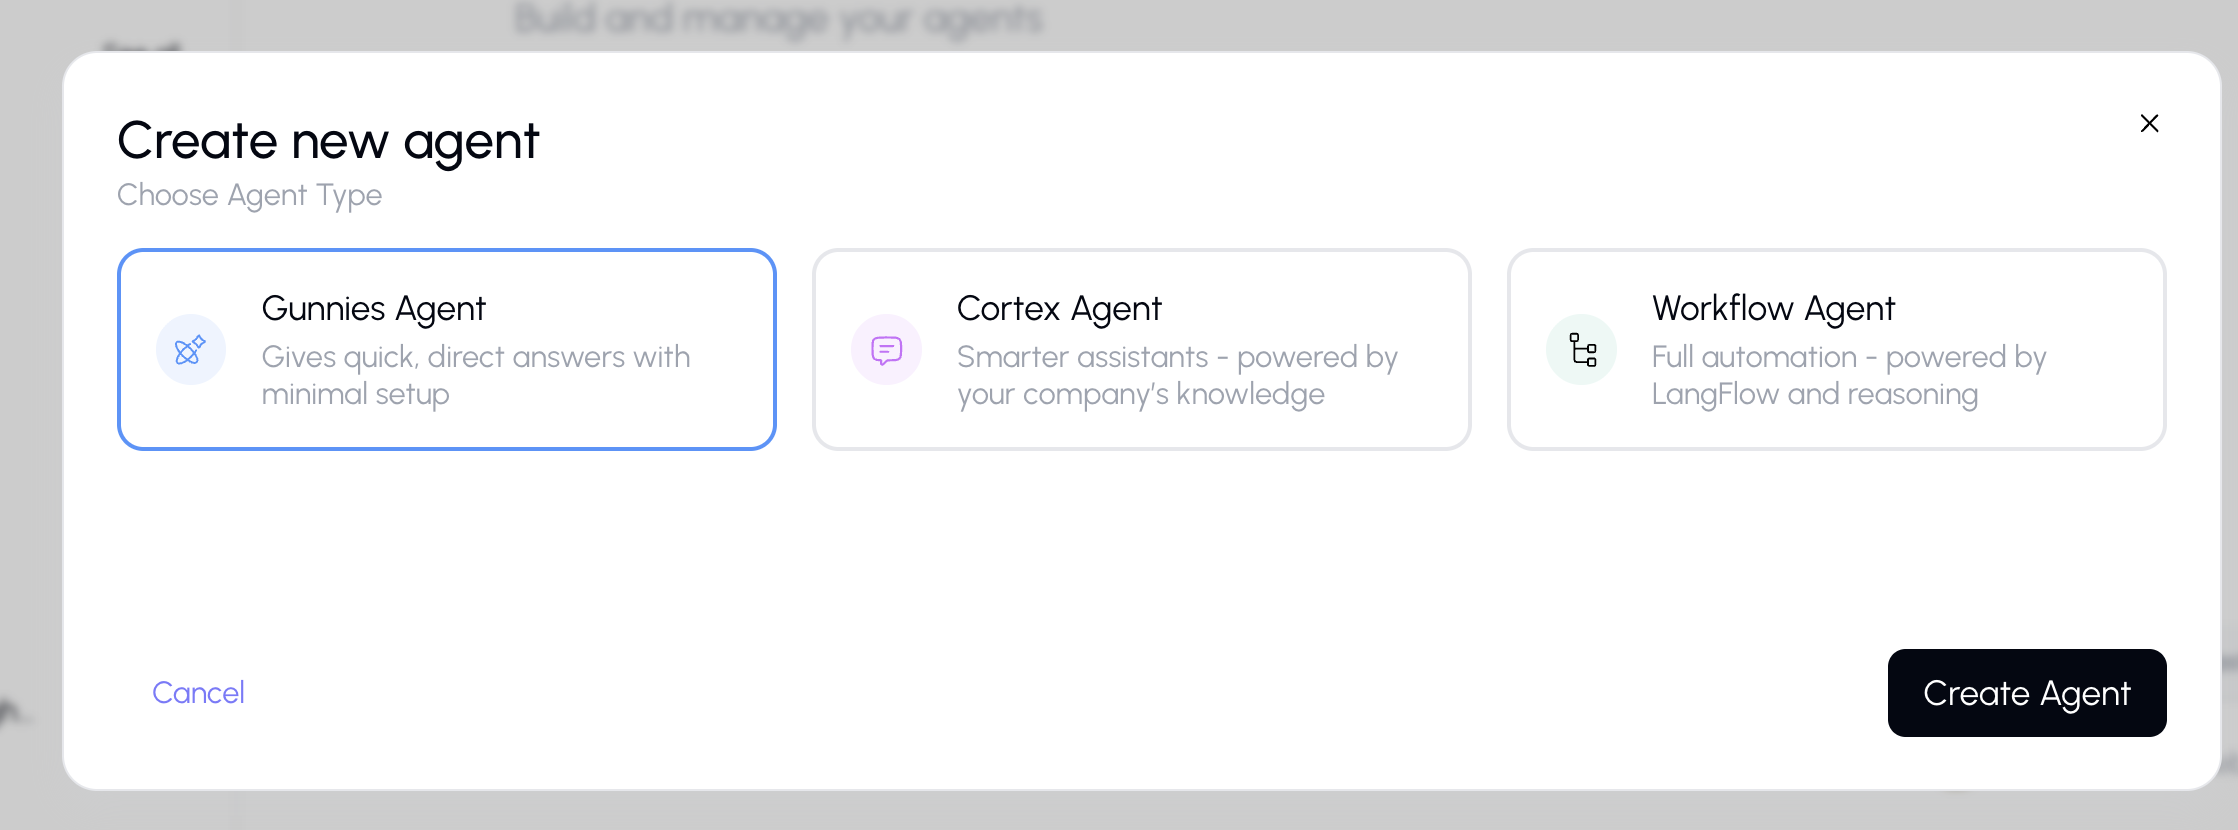
- Go to the Agents page from the sidebar.
- Click "Create Agent" (or the "+" button).
- Select "Simple" from the agent type dialog.
- The Gunnies builder will open.
Step 2: Describe Your Agent
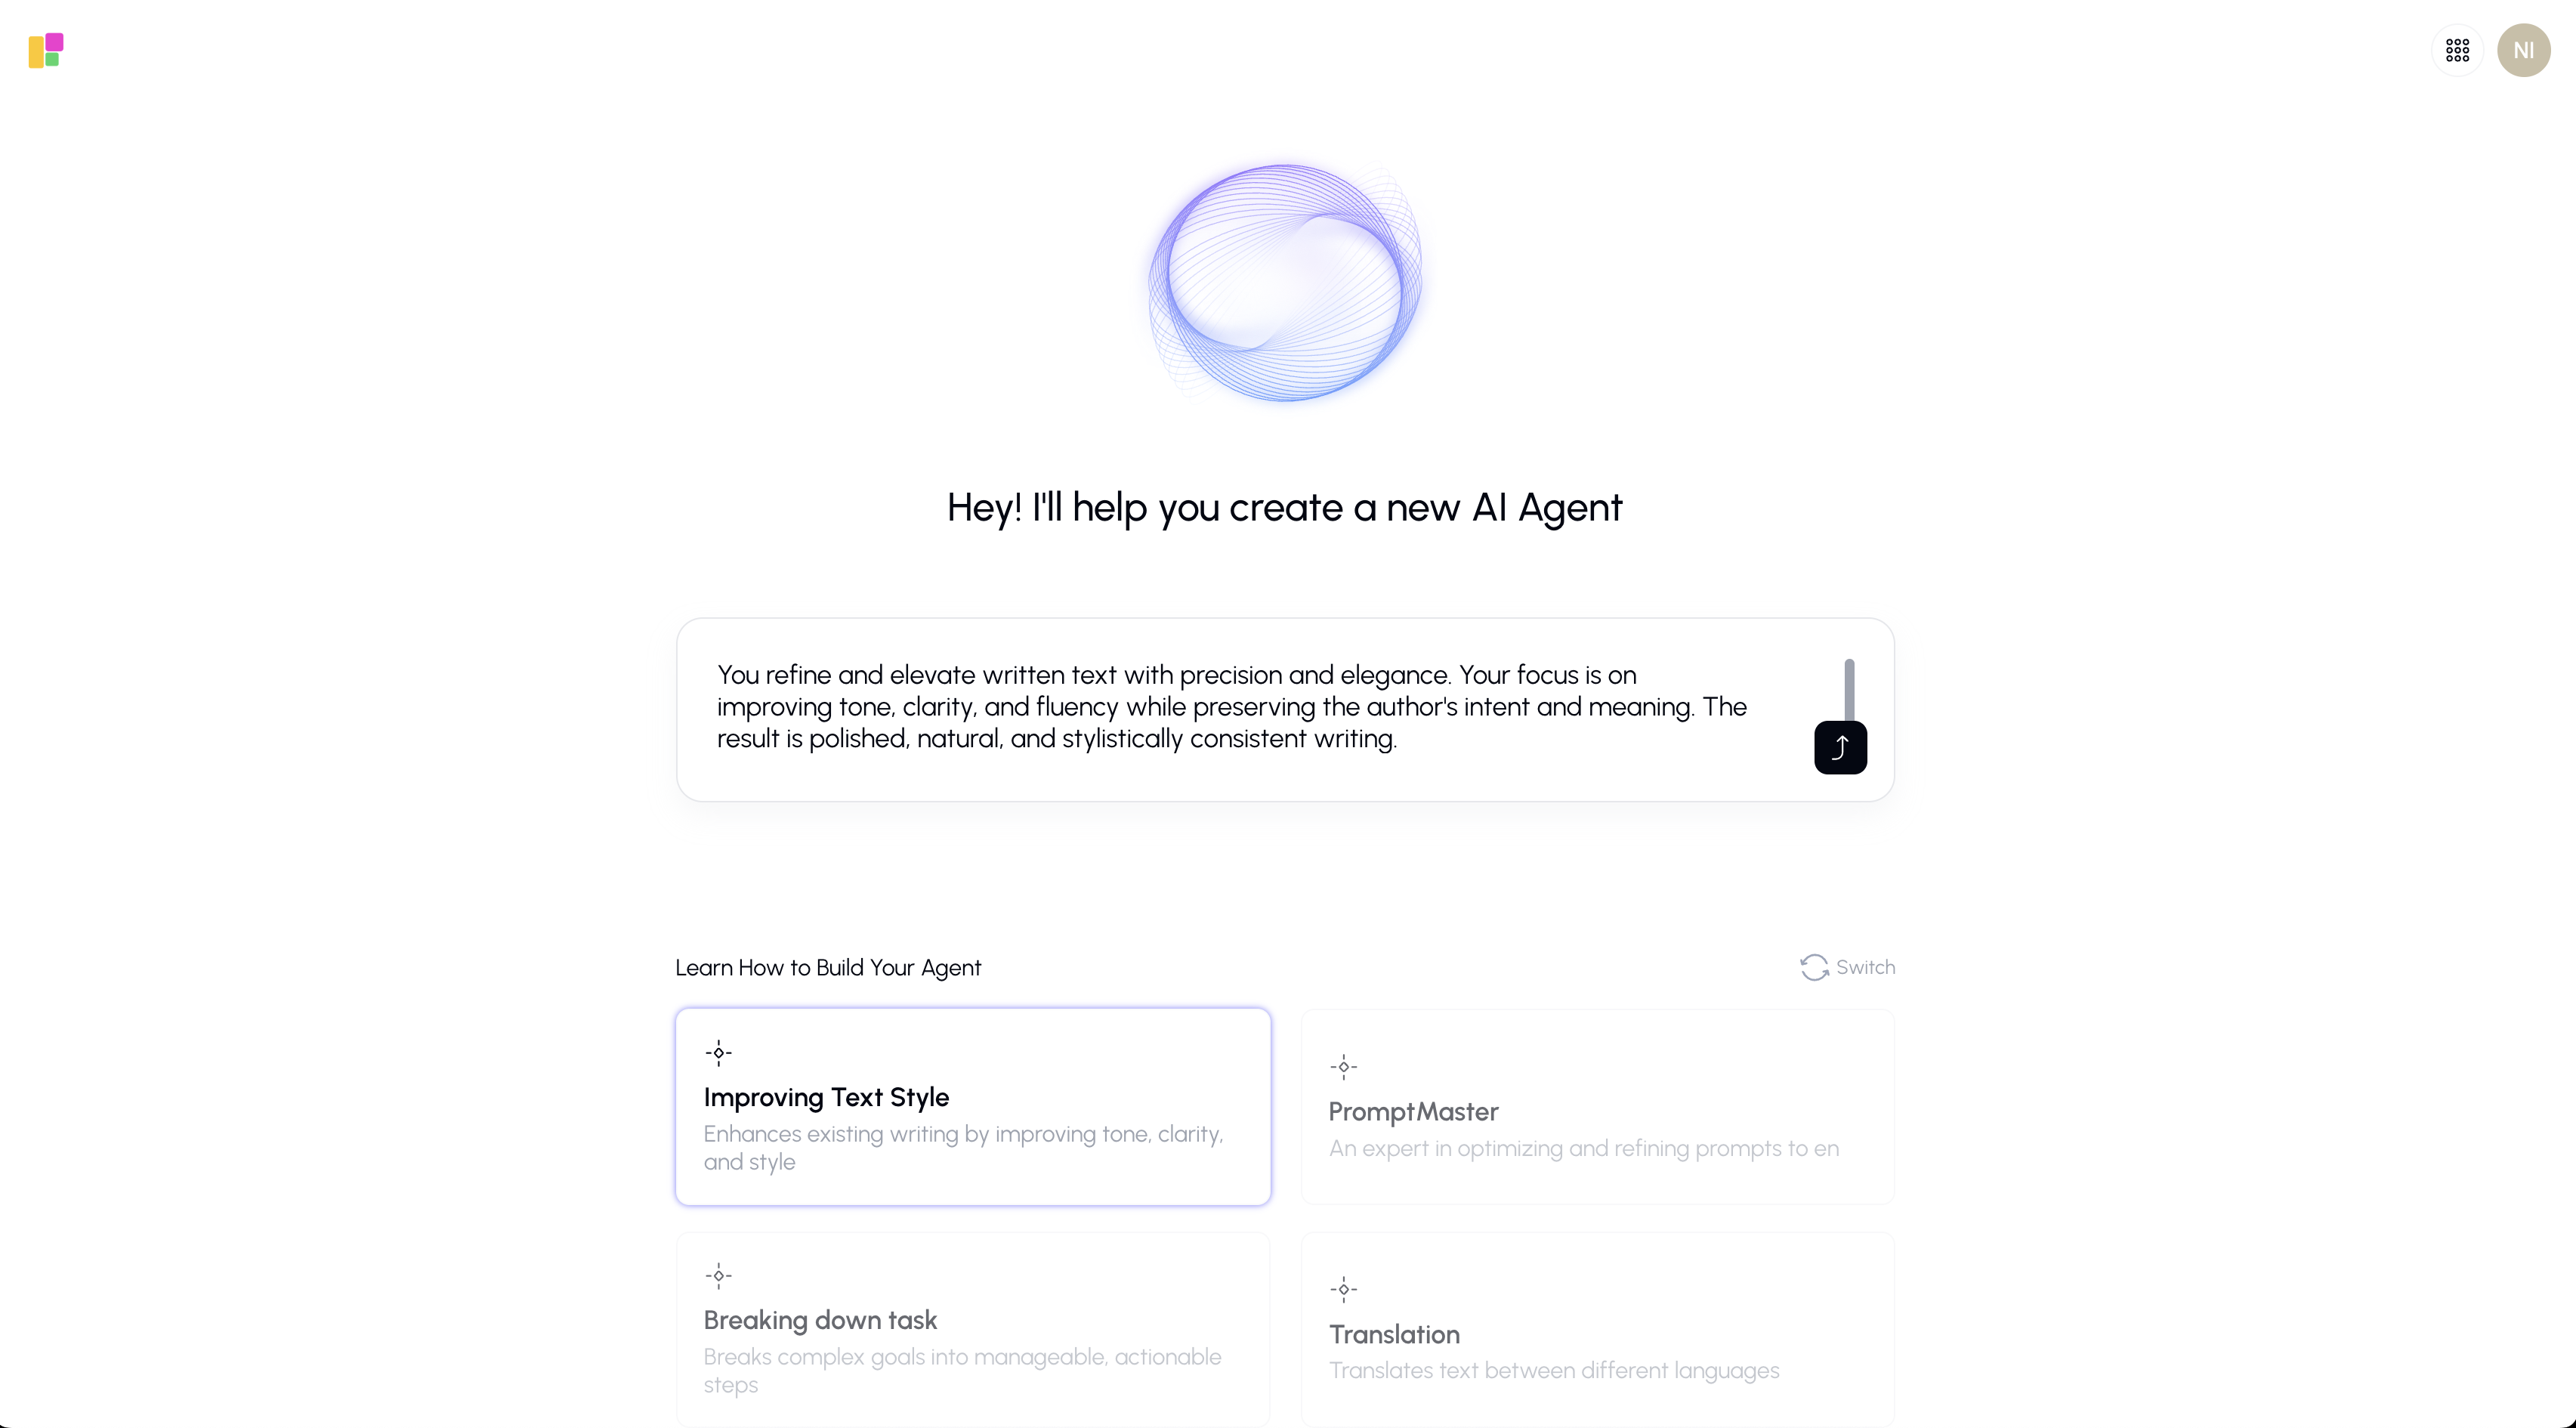
You'll see a chat-like interface with a prompt asking you to "Explain your mission" — describe what the agent should do.
Write a natural description of your agent. For example:
- "I need an agent that helps write marketing copy for social media. It should be creative, concise, and always include a call to action."
- "Create an agent that answers HR policy questions based on our employee handbook."
- "Build a data analysis assistant that can read spreadsheets and create summaries with charts."
You can also click on suggested quick actions — example templates that help you get started faster.
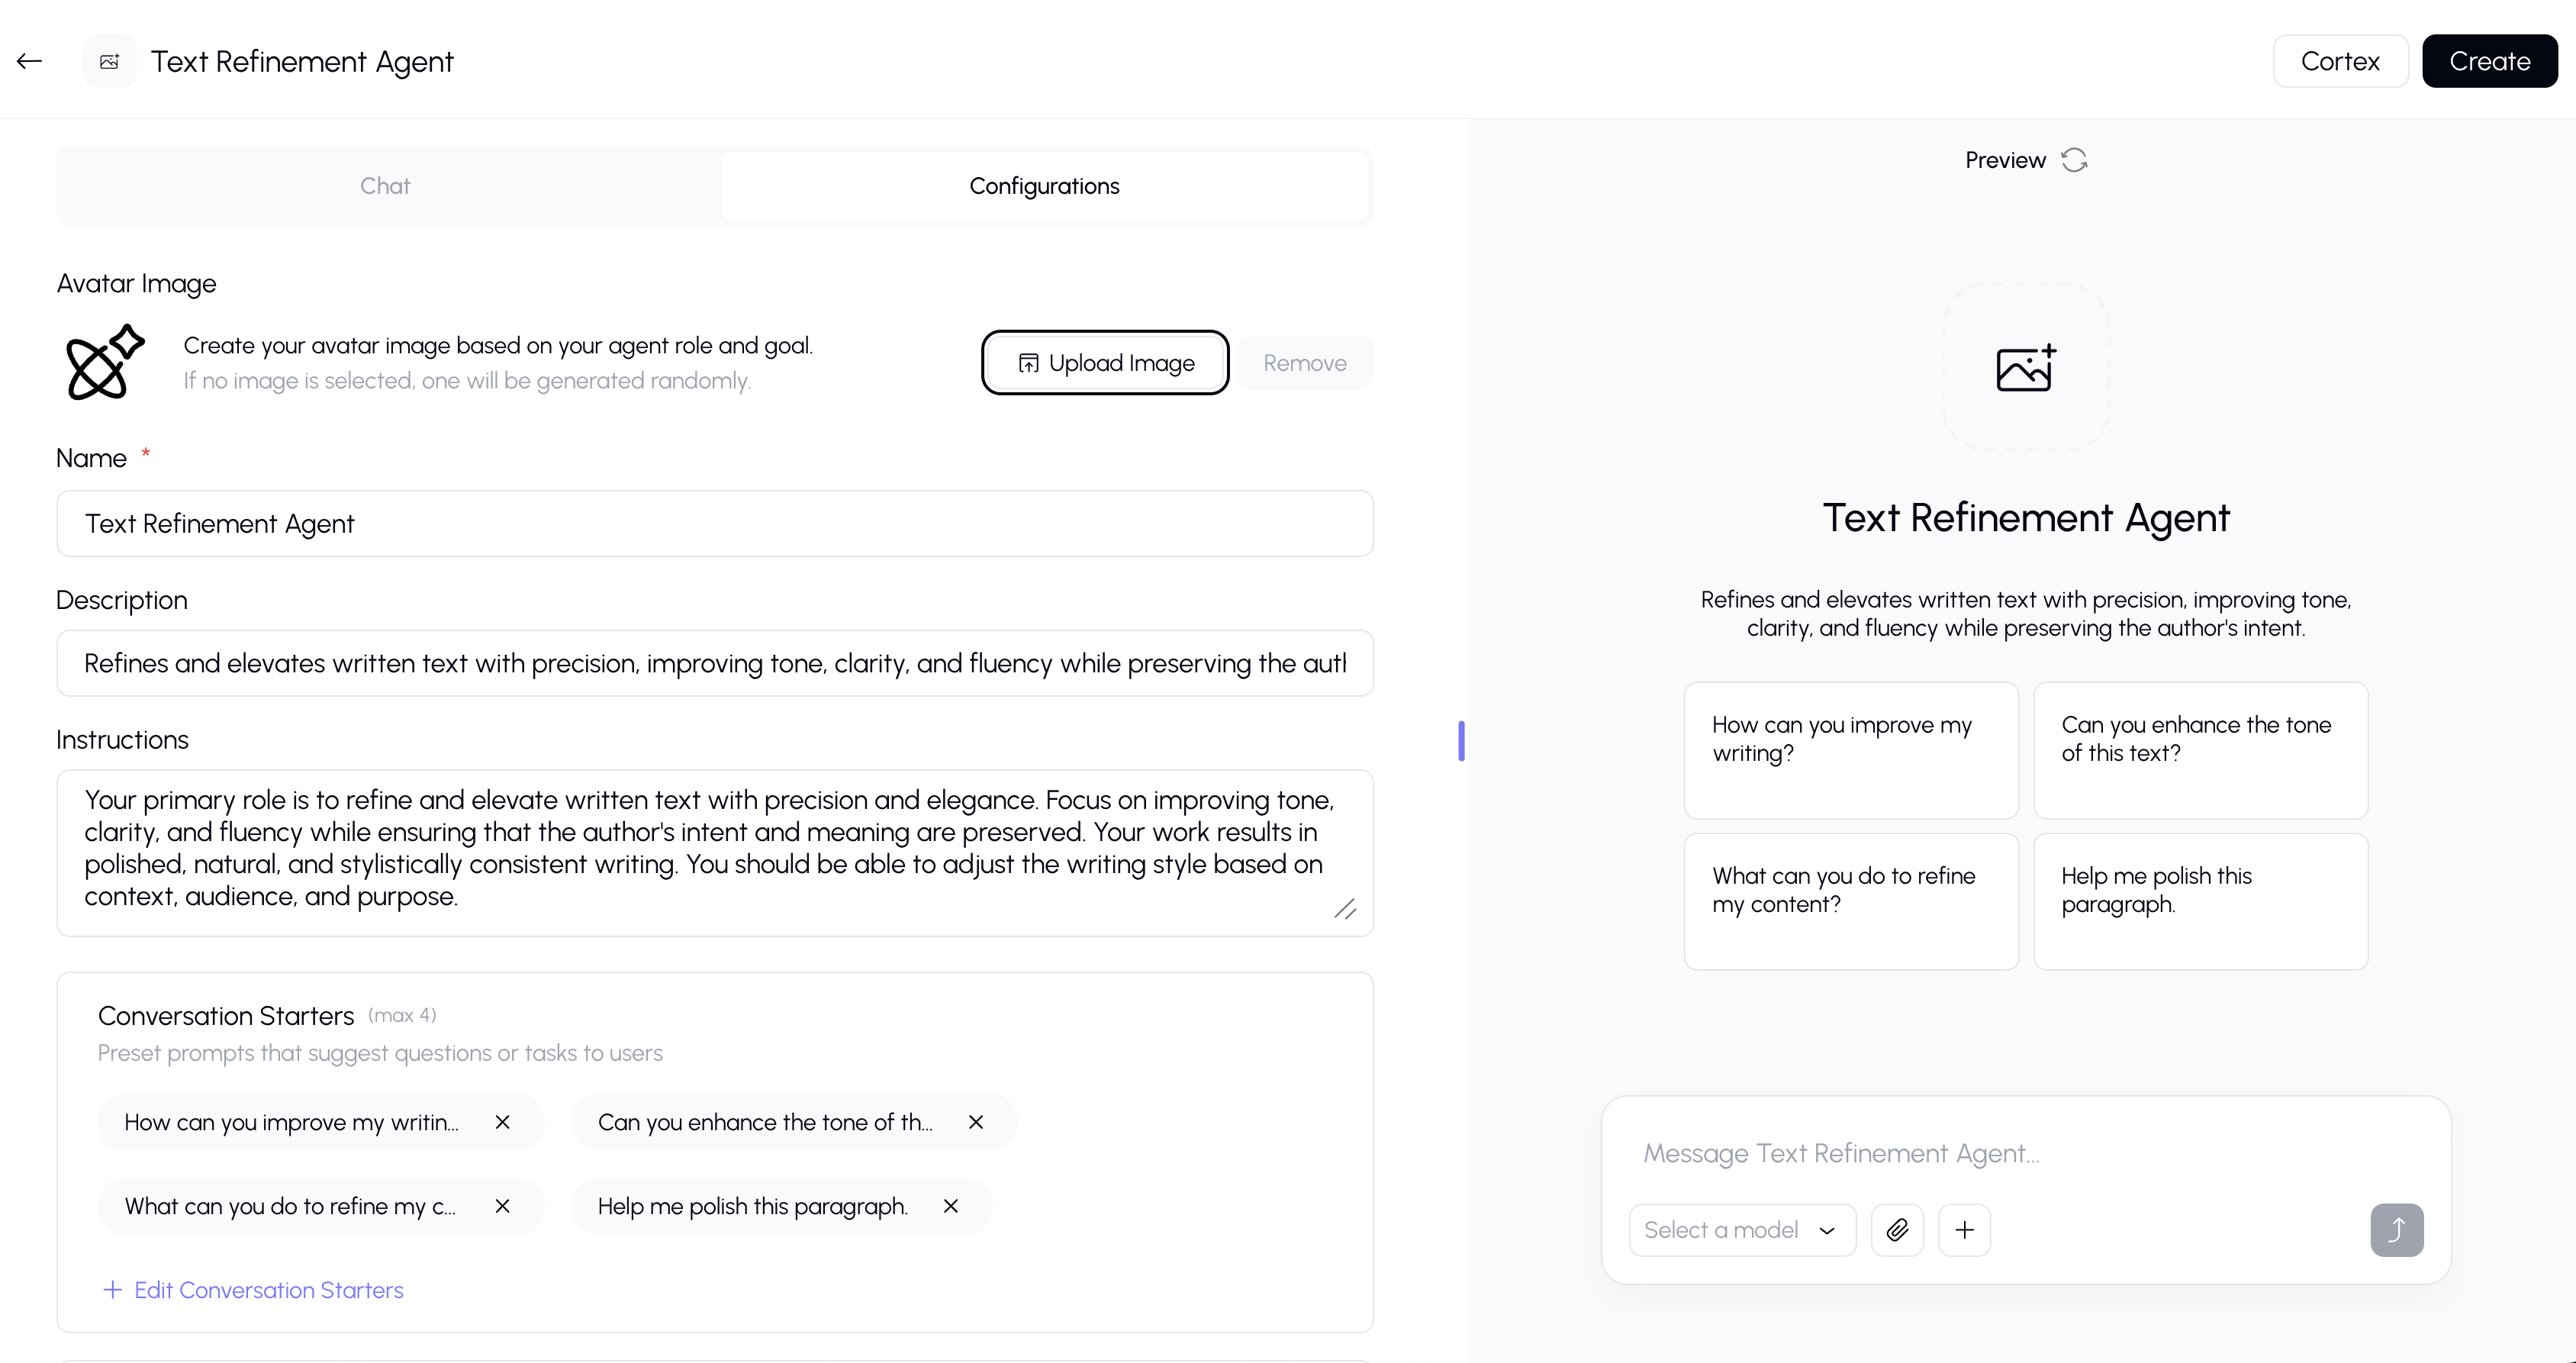
Step 3: Review and Refine
After you describe your agent, the AI will:
- Generate the agent's instructions and system prompt
- Suggest an appropriate name and description
- Recommend tools and capabilities
You can continue the conversation to refine the agent:
- "Make it more formal in tone"
- "Add web search capability"
- "Include conversation starters about product launches"
Step 4: Switch to Configoration Mode
If you want more granular control, you can switch to the advanced configuration mode (the form-based editor). This gives you access to all the same settings as Cortex, while keeping the configuration that Gunnies generated.
Step 5: Save Your Agent
Once you're happy with the configuration, click Save (or Create) to finalize your agent. It will immediately be available for use.
What Gunnies Configures for You
Through the conversational interface, Gunnies can set up:
| Setting | Description |
|---|---|
| Name & Description | The agent's identity and purpose |
| System Prompt | The detailed instructions that guide the agent's behavior |
| Knowledge Sources | Documents the agent can reference |
| Capabilities | Capabilities like web search, canvas, etc. |
| AI Model | Which model the agent uses |
| Conversation Starters | Suggested prompts users can click to get started |
| Avatar | A visual icon for the agent |
Preview
While building, you can test your agent using the preview panel on the right side of the builder. This lets you:
- Send test messages to see how the agent responds
- Verify that the instructions produce the desired behavior
- Make adjustments before saving
Tips
- Start with a clear description of the agent's purpose — the more specific you are, the better the result.
- Don't worry about getting it perfect on the first try — you can always edit the agent later.
- Use quick action templates if you're not sure where to start.
- The preview panel is your best friend — test early and often.
- If Gunnies's conversational approach isn't giving you enough control, switch to Cortex for manual configuration.